Lilypie Third Birthday tickers

Thursday, June 10, 2010

Awesome Daddy!

This daddy is totally awesome!  I am really impressed by the things that he creates for his children - his toys look cool, encourage imaginative play and (best of all) are cheap as free.  I also like the fact that this daddy doesn't limit himself to traditional 'manly' creative outlets like woodworking and metalworking, but is adept at sewing, embroidery and knitting, putting a masculine spin on his creations.

I love this little aquarium that he made (picture credit to Joel) - what makes it really special are the slots on the top of the box which allow the sea creatures to swim back and forth in their little aquarium.

He also made these amazing wooden sand combs and this innovative zoo blanket.

The best part of his site is that he often shares printable templates of his projects.

My personal favourite is his Paper City - complete with people, vehicles and even a helicopter!

Labels: ,

Tuesday, April 06, 2010

Little Treasures

Stardust has developed  magpie tendencies and during the course of tidying, I have been finding all these tiny bits of junk that turn out to be part of his treasure trove. He gets pretty upset if I throw them away or if he can't find them, so I decided that it was time he had somewhere to keep all of his shiny baubles. 

Traci from Amazing Mae has got a great trinket keeper tutorial which I thought was pretty cool, so I decided to make one for Stardust.  Her tutorial requires the use of grommets and karabiners which are apparently cheap and easy to get hold of in America, the Land of WalMart, but I cannot find these things for love or money, so I decided to make a button-closure instead. 

The tutorial is pretty easy to follow once you actually get started on it.  For those of you who lack visio-spatial abilities, like myself, I recommend doing each step whilst reading the tutorial at the same time.  This was a challenge for me, because I have never sewn a buttonhole before.

Here is the finished product:

If the material looks familiar to you, it is because it is the same IKEA material that I used in the doorstop project.  I have plenty of leftover scraps of fabric, so you will be seeing much more of this yellow striped pattern in the future.

The heart-shaped button that I used is actually one of Stardust's little treasures, so he was very pleased to see it on his 'treasure sack'.  It came from a sweet little thank you note that had a funny little fabric monster on it (you can see the note in the picture above) that Etsy seller Swee of Swiedebie sent with a purchase and Stardust decided that he would squirrel away the card along with the button which had somehow come unstuck (little fingers!).

Stardust was very pleased with his little treasure sack and is now using it to keep all his trifles.

Here is his hoard as of this morning:
It includes Swiedebie's card, a dried macaroni, a smooth pebble that he picked up at a birthday party, a five cent coin that he found at the bottom of the children's wading pool, a plastic Lego head and a red plectrum that was given to him by one of the members of the church band.

I think I will be making some more of these trinket keepers - it would be nice if I could get grommets and karabiners because then he could just clip the little pouch to his trousers when we go out.  I must keep an eye out for them when we are out shopping.

Labels: ,

Tuesday, March 30, 2010

The sky above was blue at last

Ok, so I was flipping through my blogroll and was inspired by Katie Sokoler's method of redecorating her New York flat.  Every so often, she'll change the look of her apartment with some coloured paper and artistic genius

I looked at this particular post and thought to myself...I could do that!

I made some stencils by tracing the pictures from this book onto baking parchment (I don't keep tracing paper in the house 'cos I don't use it often).  Then, I stenciled the shapes onto Stardust's water paintings, cut them out and fixed white-tac on the back.

Stardust had so much fun hanging them up on our living room wall.

Then we sat in front of the wall and admired our handiwork.  Stardust was very pleased with himself, but all that interior decorating really wore him out and he went off for his nap.

Whilst Stardust slept, I opened the front door to let in the breeze...and in flew a flock of birds!
ColorMeKatie did not mention on her website that Aves vellum are sociable creatures and that a few of them in the house would attract a whole load of them to come and stay!  I shall have to have words with her, especially if they turn out to be as fierce as the ones in her apartment.
 
There are paper sparrows roosting amongst our electrical fittings...
...and paper hummingbirds feeding from my paper flowers!
I must admit that they do look rather nice and Stardust seems to like them, so I guess they will be nesting here for a long time.

Labels: ,

Thursday, March 25, 2010

Rainy day painting

It has been raining so much over the last fortnight so we have been stuck indoors most of the day. 

Everyday, Stardust looks mournfully at the sky and says 'It's raining' in the saddest little voice, and everyday, I think to myself, 'I must get some rain gear for the two of us'.  It would be so much fun to take him out on a wet day, in a macintosh and wellingtons, and get him to splash about in puddles and watch the rain falling from the clouds.

I have not yet found anywhere that sells decent rainy day gear for children or adults so this idea will have to be kept on the shelf for now.

Instead, I decided to take this opportunity to do some water-based craft with Stardust.

Here's what we did:
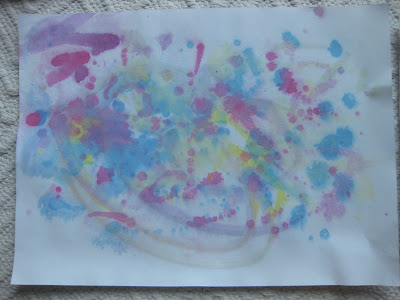
1. I soaked a sheet of paper in some water, then removed it from the water.  I taught Stardust to splatter and dribble watercolour paint all over it using his paint brush.  Then we watched as the paints spread and mixed together.

End result:
2. Using a sponge brush and a small roller brush, we covered a piece of paper with tempera paint.  I put the painting (whilst it was still wet) in a tray and left it outside in the rain.  Stardust would check on the painting every now and again to see how the painting changed with the rain.

End result:

3. We covered a piece of paper in paint and left it to dry.  We collected rain in jars and splashed the water over the painting.

End result:

I think they all look very pretty!

Stardust's art folio is starting to get rather full so I'm going to have to think of some crafts that we can do to use up these finished pieces.

Labels: ,

Monday, March 22, 2010

Turn your home into a Hallmark Sweatshop

Step 1: Take one young child and allow some Messy Painting to occur on a piece of art block paper using a roller brush , a sponge and tempera paints in a dark colour (Stardust chose blue). This is Painting 1.

Step 2: Repeat step 1 using tempera paints in a light, bright colour (Stardust chose yellow and orange).  This is Painting 2.

Step 3: Carefully prise painting materials from sticky child hands and hang up paintings to dry. 

Step 4: Wash and dry child.  Stuff child with blueberries.

Step 5: Whilst child is occupied with blueberries, cut out a 5cm x 8cm rectangle from Painting 1, round off edges and put aside.

Step 6: Cut out desired shape or shapes from Painting 2.  (I used heart shapes because I was planning to make a wedding card for a dear friend.)

Step 7: Wash and dry child to remove traces of blueberry juice. 

Step 8: Apply glue to shapes and give to child who will use small and deft fingers to afix shapes to background.  Remove glue from child's hands before releasing child into the atmosphere.

Step 9: Use a black marker to decorate the card.  A simple design is best (and is also all I am capable of). 

Step 10: Mount finished product onto a plain piece of card (10cm x 16cm, folded in half).  Write meaningful and soppy message inside card.  Place in envelope.  Mail.

Labels: ,

Friday, March 19, 2010

First sewing project: Fabric doorstop

My new Brother and I have been working pretty hard (in my opinion) and I have been trying out some simple sewing projects, following tutorials from the internet.  There are so many cool sewing tutorials out there, once one starts looking. 

I have wanted to make some fabric doorstops, ever since I saw some gorgeous ones at Laura Ashley.  Red rubber doorstops from the market at cheap at $2 for a pack of three but they are ugly to look at and I think that they deform the bottom of the door and have a limited lifespan.  Additionally, fabric doorstops filled with beans are friendly towards clumsy people like myself who are prone to stubbed toes.

They did not look too difficult to make, so I searched around and found this great tutorial by CraftyClaire

I had to tweak the tutorial a little bit, because I'm such a fool that I took more than an hour to draw out the pattern on a piece of butcher paper, even with CraftyClaire's simple instructions. 

Here is what I used:
1. Leftover butcher paper (for pattern making)
2. 45cm x 40cm piece of upholstery weight cotton fabric (from IKEA)
3. 10cm length zip (from Art Friend)
4. 1kg of non-toxic plastic weighted beads to use as filling (also from Art Friend).  Some people use rice or wood pellets or green beans. 
I started out by drawing the above-pictured cross-shaped pattern on a piece of leftover butcher paper.  I then cut out the shape and used it as a template for the fabric.  
I traced the image onto the unprinted side of the fabric and cut it out.  From the leftover fabric, I cut out a rectangle of fabric measuring 5.5cm x 15 cm and put it aside to be used as the doorstop handle.

Then, I ironed the fabric so that it would have a 2.5cm border all around it. This 2.5cm border would be used for a nice thick seam (my sewing skills aren't that great, so I needed alot of space for accidents).
I started by sewing the zip into the fabric.  The zip was to go along one of the sides at the bottom of the doorstop.  This was the hardest part, which is why I did it first.  I pinned the zip into place using straight pins and sewed one side first, then the other.
After this was done, I sewed the rest of the bottom of the door stop and also the seam which would go along the side of the doorstop.  I left the top alone until I had made the door stop handle.

For the doorstop handle, I took the 5.5x15cm fabric that I had put aside earlier and folded it in half lengthwise with the printed side facing in.  Then I sewed down the length of the fabric leaving a 2.5cm seam, making a tube with both ends open.  I turned the tube inside out so that the printed side was facing out.  With the seam in the centre, I pressed the tube flat with a hot iron to make a nice flat rectangle-shaped handle.
I pinned the both ends of the handle loosely to the top of the doorstop and sewed the top shut.  The open ends of the handle would lie inside the doorstop once it was sewn shut.  The seam of the handle would be hidden from view.

I unzipped the zip and turned the whole thing inside out so that the printed side was facing out with the handle sitting pretty on top.  Then, I put the ziplock bag into the doorstop and filled it up to the brim with the plastic beads, zipping the ziplock bag carefully shut when I was done.  Voila!  One doorstop completed in an afternoon!

Take a look at what I made!  Aren't they cute?  I am so proud of myself for making them - thank you so much CraftyClaire for the tutorial!

Labels: ,

Tuesday, February 02, 2010

Party Preps Day 2: Party Gear

I always think that birthday parties are just not complete without party hats! They encourage people to get into a party mood and to relax. It is hard not to smile when you're wearing a silly hat!
I want all the adults and the children to wear party hats, but I don't really like those conical dunce hats that are sold in the shops. True, they have bright and cheerful designs printed on them, but they are so uncomfortable to wear. The elastic bands always snap and there are never enough replacement hats around.
A good friend of mine introduced me to this great origami website, so I decided that I would fold newspaper hats instead of buying them from a store.
I made a few small hats to start with and tried them on Stardust. He absolutely loved them! They stayed on well when he was running around the house and they must have been comfortable to wear because he didn't try to take them off.
I made some bigger ones and tried them on myself - they stayed on pretty well when I was wandering around the house and were so comfortable that I forgot I was wearing them. MDH was very amused when he came home and found me doing the ironing or the cooking with a different paper hat on each evening.
This means that I can put out crayons and markers during the party so that the children can customise their own chapeau, and if anything gets destroyed, I can just fold them a new one!
I decided to fold several different styles so that not everyone would be wearing the same hat.
I made samurai-style helmets, flat berets, bucket hats and tall mitres for the grownups.
For the kiddies, I made simple paper beanies and army-cadet caps. These have a much more snug fit so they are better for them to run around in.
It was so much fun!
I made 40 hats for the adults and 20 hats for the kiddies.
Total cost: Less than the cost of one newspaper!

Labels: ,

Tuesday, January 26, 2010

Alphabet Art - E

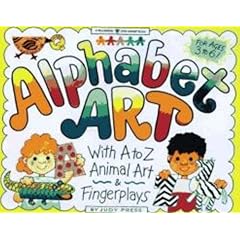
Stardust received this brilliant book over Christmas, Alphabet Art, by Judy Press. It has so many cool crafts ideas for preschoolers!

After looking through it, I went out to Art Friend one weekend and bought a whole load of tempera paints and coloured construction paper. It was so exciting!
We've been going through the book systematically and learning a new letter each week. Stardust just loves the change in activity and looks forward to 'do-ink craffs' at his little table.
Some of the activities take a little bit of planning on my part to make sure that I have all the necessary materials.
For example, Stardust was learning the letter 'E' this week. Over the weekend, I saved the eggshells from our breakfast and made sure they were clean and dry. I also outlined the uppercase and lowercase letters using black marker on a paper plate and cut off the rim so that I could tape it flat to the tabletop.
I put the eggshells into a ziplock bag and gave Stardust a wooden mallet to use. He was rather bemused at first, but after I showed him what to do, he quickly got into the spirit of things and unleashed his destructive powers.
There was a very satisfying crrrrr-ackkking and crrrrrr-unching sound as he smashed the eggshells into a gazillion tiny pieces, cackling evilly to himself.
I applied dribbly glue liberally over the surface of each letter, and Stardust very carefully sprinkled the eggshells over the glue, tapping them gingerly into place with the tips of his fingers.
Tadahhhh!

The best part of all this is that Stardust very clearly remembers this activity and will repeat 'Eh, eggshells!' whenever he sees the letter 'E' printed anywhere.

Labels: ,

Tuesday, December 08, 2009

A name that's lighter than air

Today, we made a paper warbonnet which Stardust immediately dubbed his 'Windy Hat'. He wore it proudly during his evening constituitional.

He ran along the garden paths, the paper streamers fluttering and rustling as he moved. A dried brown leaf became a boat for saving flying ants that struggled in the fishpond. A fluffy stalk of pampas grass became a quill for gilding the pavement with swirling designs that changed as they evaporated. A dull grey pebble became a throne for a bright orange millipede king.

Everything is an adventure when you're 20 months old and wearing a Windy Hat.

Labels: ,

Saturday, December 05, 2009

Natural jewellery

I took Stardust for a short ramble around our apartment block earlier this week.
Stardust usually likes to gather interesting objects that he finds on our rambles so I thought I would help him organise his nature collection. I made him a pair of sticky bracelets out of masking tape - he was very excited about them and clasped his hands together, holding his elbows out so that the bracelets would stop sticking to each other.
I showed him how to stick fallen leaves to his bracelets. At first, he was very distressed about destroying his sticky bracelets by covering them up with leaves, but eventually he decided that the a pair of leafy cuffs would be very fashion-forward.
We walked around and he selected fallen leaves of a similar size and colour (I realised this only after we completed the bracelets). Carefully, I helped him arrange the leaves. He was very proud of them, twisting them this way and that to admire them.
After we got home, I cut the bracelets off and hung them up to dry.
A few days later, I realised that the leaves curled up as they dried and pulled away from the masking tape. When I tried to press them flat, they crumbled and I had to throw the bracelets away.
Next time, I think I will buy a jotterbook and press his finished creations within!

Labels: ,

Creative Commons License
This work is licensed under a Creative Commons License.